Simply Stitches - A Basic Biscornu Tutorial
I just love Freda's newest pattern Simply Stitches. I thought to myself - wouldn't it be cool if I had more than one? Two is perfect - but in different colours! The original design is stitched using the amazing overdyed threads by Colour Complements. What if I stitched another - in different colours, using DMC perle cotton? There's some pretty awesome colours in their variegated range of threads.
So... I went shopping at my LNS and found a nice selection of the DMC threads and got to stitching. The Simply Stitches pattern is pretty straight forward - it's a great little pattern meant for stitchers new to canvas work. It's also great if you are looking for a design that stitches up quickly!

The pattern calls for 6 perle #5 skeins so I picked 6 skeins in colours that I liked. It would be really easy to pick from stash for this design too! Bright solids would also work very well (or a mix of solids and variegated threads - it's totally up to you). I have listed the threads I used in my DMC version at the end of the blog.

The first step in making a biscornu is to add a border around the design. I did this by adding 3 rows of back stitch around both of my stitched pieces. I used a solid DMC perle 5 that matched the threads that were used in both of the designs I stitched.
IMPORTANT - make sure the border is exactly the same number of stitches on both the top and bottom pieces! Also make sure that the border is SQUARE (each side must have the same number of stitches).
The next step is to get the two pieces ready to sew together. You'll need: your two stitched designs (top and bottom pieces), cotton fabric backing (I used black Kona cotton that matched the black mono canvas) and some Mistyfuse.


About Mistyfuse - it's like a spidery web glue - and it's awesome! Just don't get it on your iron. I treat this product cautiously - I love it - but once it has been melted into place between layers of fabric - its permanent. Make sure your placement is perfect. There is no going back!
Make a sandwich - your embroidered design, a piece of Mistyfuse and your cotton backing.


Iron your sandwich (no steam) - make sure the stitched piece is face down and not touching the iron. I use a wool felt mat when pressing an embroidered design so that the stitches do not get squashed.
Hold and press - do not rub back and forth. Keep pressing until the Mistyfuse is melted in place. Remember, don't press too hard - you don't want to squish your stitches!
Let cool.


Trim the edges - I trimmed to 1/2" around the back stitch border. If this was a smaller biscornu, I would have reduced to 1/4".

And here are the top and bottom - all trimmed up and looking rather fantastic!

Finger press the edges to the back. Also do the corners.


Sewing the Biscornu
Step 1 - lay the two pieces together. Find the center of the top piece. Start your thread on one of the corners of the bottom piece.


Step 2 - using the same colour thread as the back stitch border, connect your first stitch through the corner of one piece (the bottom) and the center of the other piece (the top). Pull the first stitch gently so that the two borders meet.

Step 3 - gently turn the bottom piece so that the border meets the edge of the top piece.

Step 4 - Whip stitch through the back stitches - go through 3 or 4 of the back stitches and then gently pull the thread so that the two backstitch borders meet. Work your way across, keeping the two pieces aligned. Make sure that when you get to the first corner, the stitches are lined up.
Tip: When you pull the whip stitches - pull towards the area that you have not stitched yet. Remember to not pull too tightly.


Step 5 - Turn the corner, making sure that the corner back stitch matches up with the center back stitch. Tuck the raw edges under as you go. You can pinch the edges in the back with your non-stitching hand (the 1/2" raw edge is very convenient. It's quite easy to grab on to as you continue to stitch).
... and YES - this is very awkward to do. I find the first couple of corner turns are the worst, but after that, you can start seeing the biscornu shape starting to form.


Step 6 - Keep whip stitching along each side, pulling gently to tighten the threads every few stitches.
Remember - make sure your corners from the bottom side always align with the middle of the top side.
If you have to change threads - make sure you do it on a straight edge (not a corner). I changed threads about half way around. It's also easier to finish the last edge of the biscornu with a longer thread.
As you stitch the edges, the little pillow shape starts to form.


Step 7 - Continue whip stitching until you get to the last side. Continue tucking the edges inside the biscornu shape. Ensure that the last edge is aligned. Stop stitching and leave the last edge open - it's time to fill the biscornu!


Step 8 - fill the biscornu up. I used plastic pellets (from Michael's). You could also use walnut shells or batting. I like my biscornus to be hefty and nut free so prefer plastic pellets.


Step 9 - sew the last side closed. My biscornu is VERY full of pellets! Continue with the whip stitch to finish the last side.


Step 10 - finish your thread by weaving your needle through previous whip stitches. Finish the thread with a couple of knots and then push the thread into the pillow coming up in a non-stitched area - pull the thread a bit and carefully cut it close to the mono canvas (the end should pull back into the pillow shape).

Step 11 - create an indentation in the biscornu - this is optional! This particular biscornu is quite large and it looks really good as is without an indentation. If you choose to, you can add a button or stitch in the center of the biscornu to create an indentation. I decided to add a cross stitch to the center.
I really like the big brick style of this biscornu. I filled it really full of plastic pellets, so the indentation that I ended up with is not as deep as other biscornus I have made.
This is a biscornu design from Lorene Salt - it's very indented and the button is perfect!

A button on each side can be attached and drawn through to create the indentation, but with this one, I decided to add a cross stitch using black perle #8 thread instead so the design would not be covered up.
Step 11 - Use a long darning needle so that you can get through the whole biscornu - it's thick!!

Cut a long piece of thread, thread the darning needle and then pierce through the biscornu in the center - leaving a long tail. Creating a cross stitch on both sides by stitching directly through the center of the biscornu - you'll have to make sure the centers of the top and bottom are aligned when you push the darning needle through. A straight tacking stitch which goes through both sides can also be used.
Step 12 - Squish the center of the biscornu as you sew the stitch so that it creates an indentation - a less full biscornu would have a deeper one!


Step 13 - Finish the thread on the same side as where the tail is, tie a knot and bury the thread ends into the biscornu (in similar fashion as you finished the thread when you closed the last side).
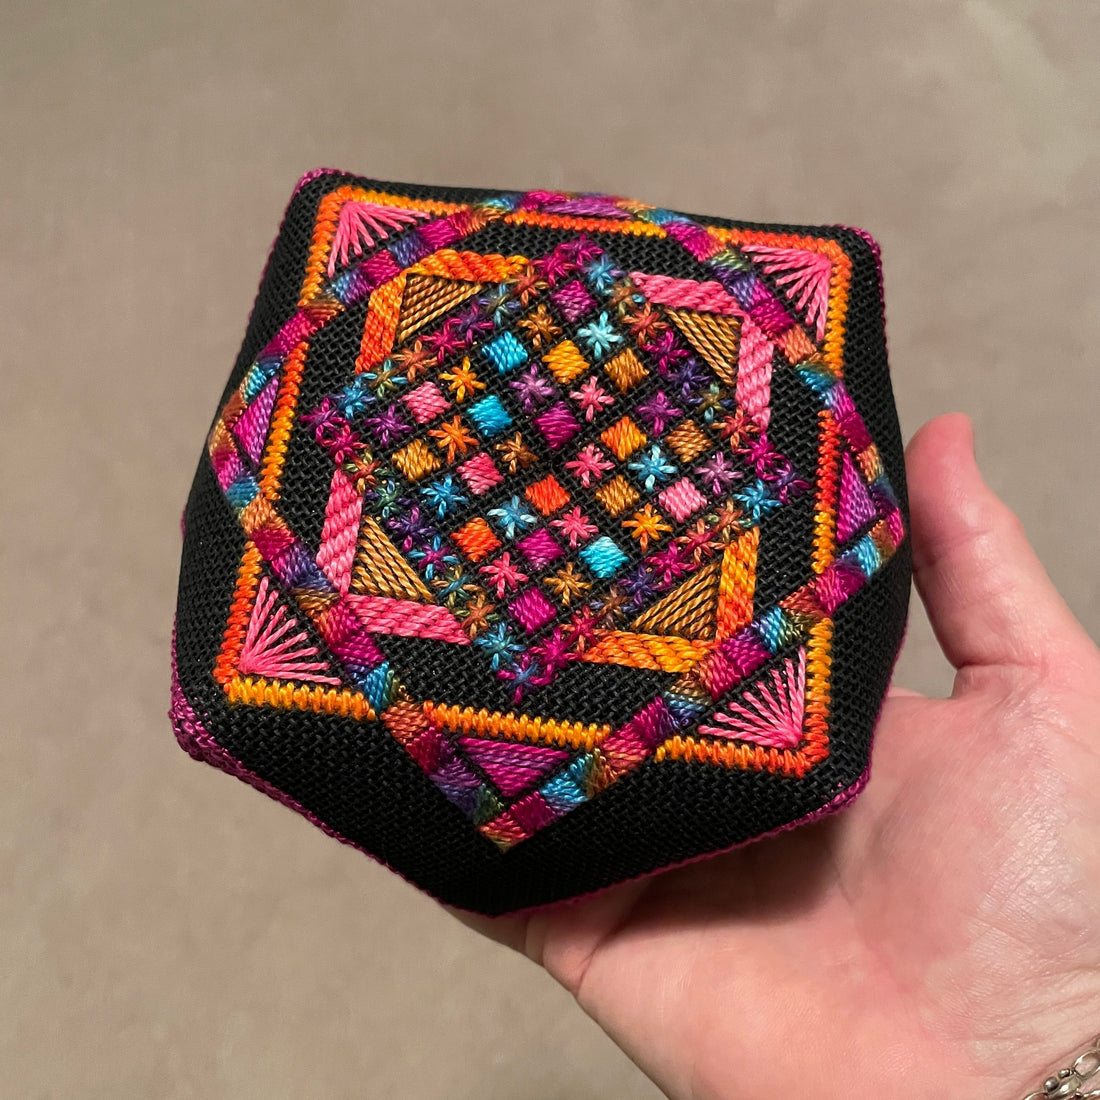
And now you are all finished and you have this lovely little piece to enjoy! It can easily be used as a pincushion, but I will be adding it to my bowl of smalls (and other lovely biscornus that I have stitched over the years.


My DMC #5 Variegated Thread
Turquoise - 4025
Yellow/White - 4077
Orange/Yellow - 4122
Green - 4047
Purple/Pink - 4212
Green/Yellow - 4050
The backstitched border was stitched with DMC #5 - 34