Painting Mono Canvas - A Tutorial
This tutorial came about as I was kitting up my next Freda project - It's Tree Time. As I was cutting the mono canvas that I had purchased to size, I realized that I bought the wrong colour!
There is quite a difference between the two green canvases (I purchased Santa Fe Green, and the pattern calls for Victorian Green). As I needed only a small piece of mono canvas (8" x 7") I didn't want to repurchase another piece of canvas as I had a lot left over!!
You can see in the picture here the difference in the greens.

So.... I decided to paint the canvas! I have not explored painting mono canvas before and, as it turns out, it's quick and easy to do. In addition, painting the canvas has added depth and interest to the finished piece. And now I've created my very own custom overdyed canvas!
My little mistake by purchasing the wrong colour has presented me with an opportunity to try something new. I am not one to shy away from trying new techniques and exploring a mixed-media technique like mixing paint, fabric and embroidery interests me greatly!
What kind of paint do you use?
For this project I decided to use acrylic paints as I wanted to ensure that I had good coverage on the canvas. I also wanted to make sure that the final result would be a nice, deep green colour with a similar tone as the Victorian Green. My aim for the final shade was to be a little darker so that the stitching popped on the canvas.
Picture and Video Tutorials
There are two ways to enjoy this tutorial - I've written a picture tutorial below, and I have also made a short video. Enjoy!
Video Tutorial - Painting Mono Canvas with Acrylic Paint
Supplies needed

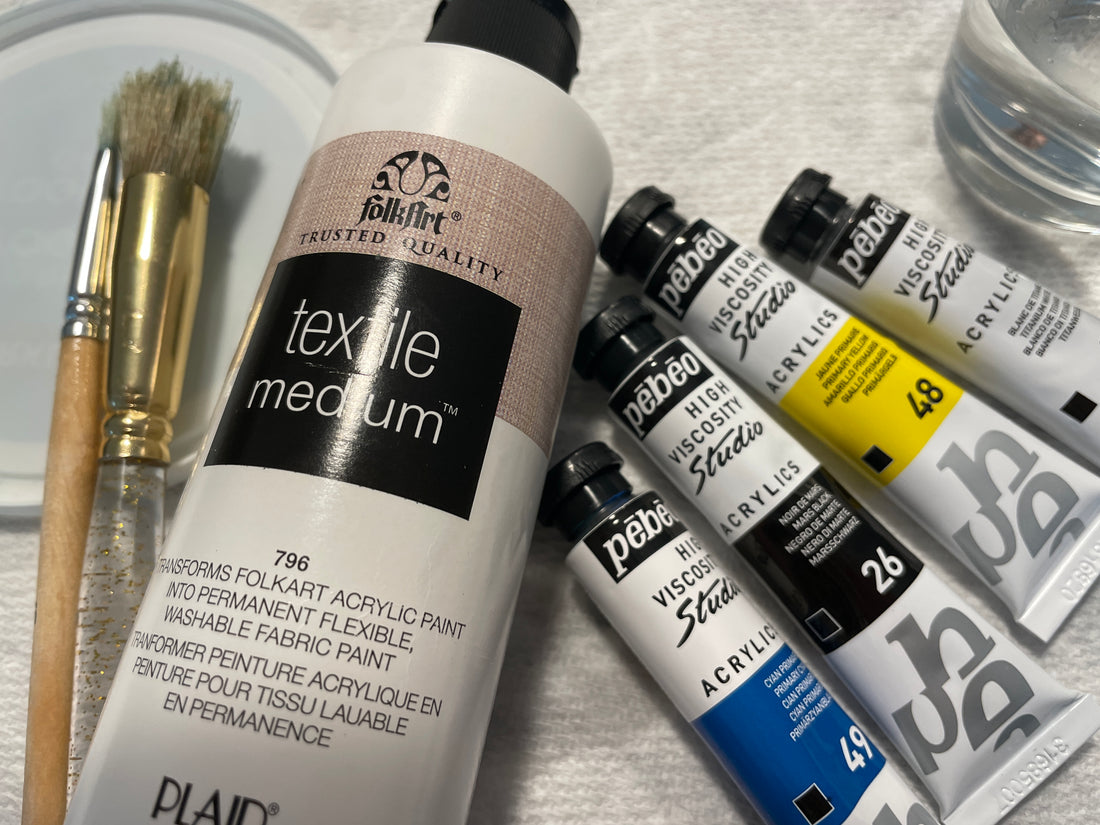
acrylic paint (I had the pebeo brand on hand)
textile medium
paint brush - to mix the paint
large stencil brush - to paint the canvas
plastic lid
water - to rinse brushes
scrap paper/paper towel to cover surfaces
Let's get started!
Mix your paint colour - this is the subjective part. The paint set I had did not have the green I wanted already premixed, so I decided to make my own green! I used quite a bit of blue (about 60%) and some yellow (30%).
How much paint do you make? Another hard thing to plan - but try to make more than you think you will need. You can use the textile medium to stretch the amount of paint if you have to (but the more you add, the thinner the paint gets).
A note on water - I did not use any water to thin the paint. I also did not wet the mono canvas before painting.


The green I came up with was pretty good, but not quite dark enough. I decided to add just a tiny (very, very tiny) amount of black. This deepened the green to just the right shade.


The paint was quite thick, and I wanted to get good adhesion to the mono canvas, so I decided to add some textile medium to the paint. The textile medium thins the paint without losing the depth of the colour. It also helps adhesion to the canvas.

Once the textile medium has been mixed in, we are ready to start painting. Place your canvas on top of some scrap paper. Load some paint onto the large stencil brush (use a clean side of your paint tray to rub the paint into the brush). Try not to add too much paint to the brush.


Now start painting!! This is the fun part where you get to experiment as you paint the canvas - add more paint for darker areas, use less paint for lighter areas. Creativity is your guide here! I wanted my finished canvas to be a little irregular (both light and dark areas).
I brushed the paint on using a circular motion. Once you get going, the painting is quite fun! If you find an area too light, get more paint on the brush and make the area darker.

Lift the canvas occasionally to make sure that the paint is not filling the holes in the mono canvas. If some of the holes do have paint in them, rub them with your brush until the paint is gone (it helps to do this when the brush doesn't have much paint in it.

Paint to the edge of the canvas (make sure that the stitching area is completely painted). Go back an add more paint to certain areas (if you want). Keep checking to ensure that none of the holes of the canvas are full of paint.
When I was finished painting, I moved the canvas onto a clean piece of paper towel. This is a good way to check to see if you have achieved the look you want (and also to make sure there is no extra paint in any of the holes. I went back and added a bit more paint to the lighter areas.

And finally the canvas is finished. I let it dry over night. It was mounted on stretcher bars the next day and ready to stitch!!


Off the stretcher bars, the canvas looks really interesting. I've created my very own - one of a kind - custom designed canvas.

I placed a dark green piece of felt under the canvas before it was framed to deepen the green.
And voila - this lovely piece is done! The painted canvas looks spectacular!

