A Tutorial - Mini Bell Pull
I just love the mini row sampler design that is included in Making Waves - one of Freda's newest designs! The row sampler is petite and has a finished size of 2 1/2" wide by 6" tall. This set of 4" brass bell pull rods made by Permin of Denmark were recommended to me by my local LNS. The brass rods are really nice! They have a great weight and don't overwhelm the overall finished design. Permin offers a wide ranges of sizes in the brass bell pulls - I highly recommend!
Materials that you will need to make your own mini bell pull:

- A finished piece of stitching - I used the mini row sampler for Making Waves
- Mistyfuse (sheer fusable webbing)
- Bell pull hardware - for this project I used the 10 cm (4") wide brass rods
- Pellon Peltex Ultra-Firm Sew-in Stabilizer
- Wool felt (for the backing)
- Quilting fabric (for the casings)
- Lady Dot Chenille Trim
Step 1 - Trim the canvas (l left 3/4" around the finished design), the pellon stabilizer, the wool felt backing and the Mistyfuse.
I will make the case here of measuring twice and cutting once! You need to make sure that the finished width of the bell pull fits properly on the rod. The bell pull rod is exactly 4" long WITHOUT the finials (screw cap ends). I wanted to make sure my finished pull was just a bit less than 4" so that there was some space between the edge of the bell pull and the finials.

Step 2 - Place the embroidery face down on your ironing pad, lay a piece of Mistyfuse on the back of the stitching and then place pellon stabilizer on top.
Press (very gently) and hold - it will take a few extra seconds for the heat of the iron to reach and set the Mistyfuse that is against the stitching. Let cool.
Tip: Make sure you don't let the Mistyfuse touch your iron. It's basically glue and will make a big mess!! I make sure the Mistyfuse pieces I used were around a 1/4" smaller than the cut pieces of fabric.


Tip: Don't press too hard on the finished embroidery design - you don't want to crush the stitches. I always use a wool ironing pad under embroideries when I iron them. Also keep in mind the threads that were used in your stitched piece and adjust the temperature of the iron accordingly.
Step 3 - Lay the second piece of Mistyfuse on top of the pellon stabilizer and then place the wool felt back on top. Press again till the Mistyfuse binds the felt to the stabilizer. Let it cool.
Trim off any excess felt backing (I found that the wool felt I used stretched a bit when it was ironed).


Step 4 - Adding the casings to the top and bottom of the bell pull.
Cut two pieces of quilt fabric to make your casing. I cut my fabric so that the width was a 1/4" wider than the canvas on each side. The length is 2.5"
Fold, press and top stitch the side edges of the casing fabric. Fold the raw edges together and press.


Place the raw edges of the casing piece against the top and bottom edges of the canvas (finished side up) and sew into place. I used a scant 1/4" seam allowance. Press flat and top stitch.


Fold the edge of the casing piece around to the back of the bell pull. Clip and attach to the back edge using an invisible stitch (I like the ladder stitch). Use the hardware to establish the size of the opening for the casing.


Step 5 - add the chenille trim
The last step is to cover the raw side edges of the bell pull. I really like using the chenille trim by Lady Dot. It's versatile and provides a very nice finish for pieces like this.
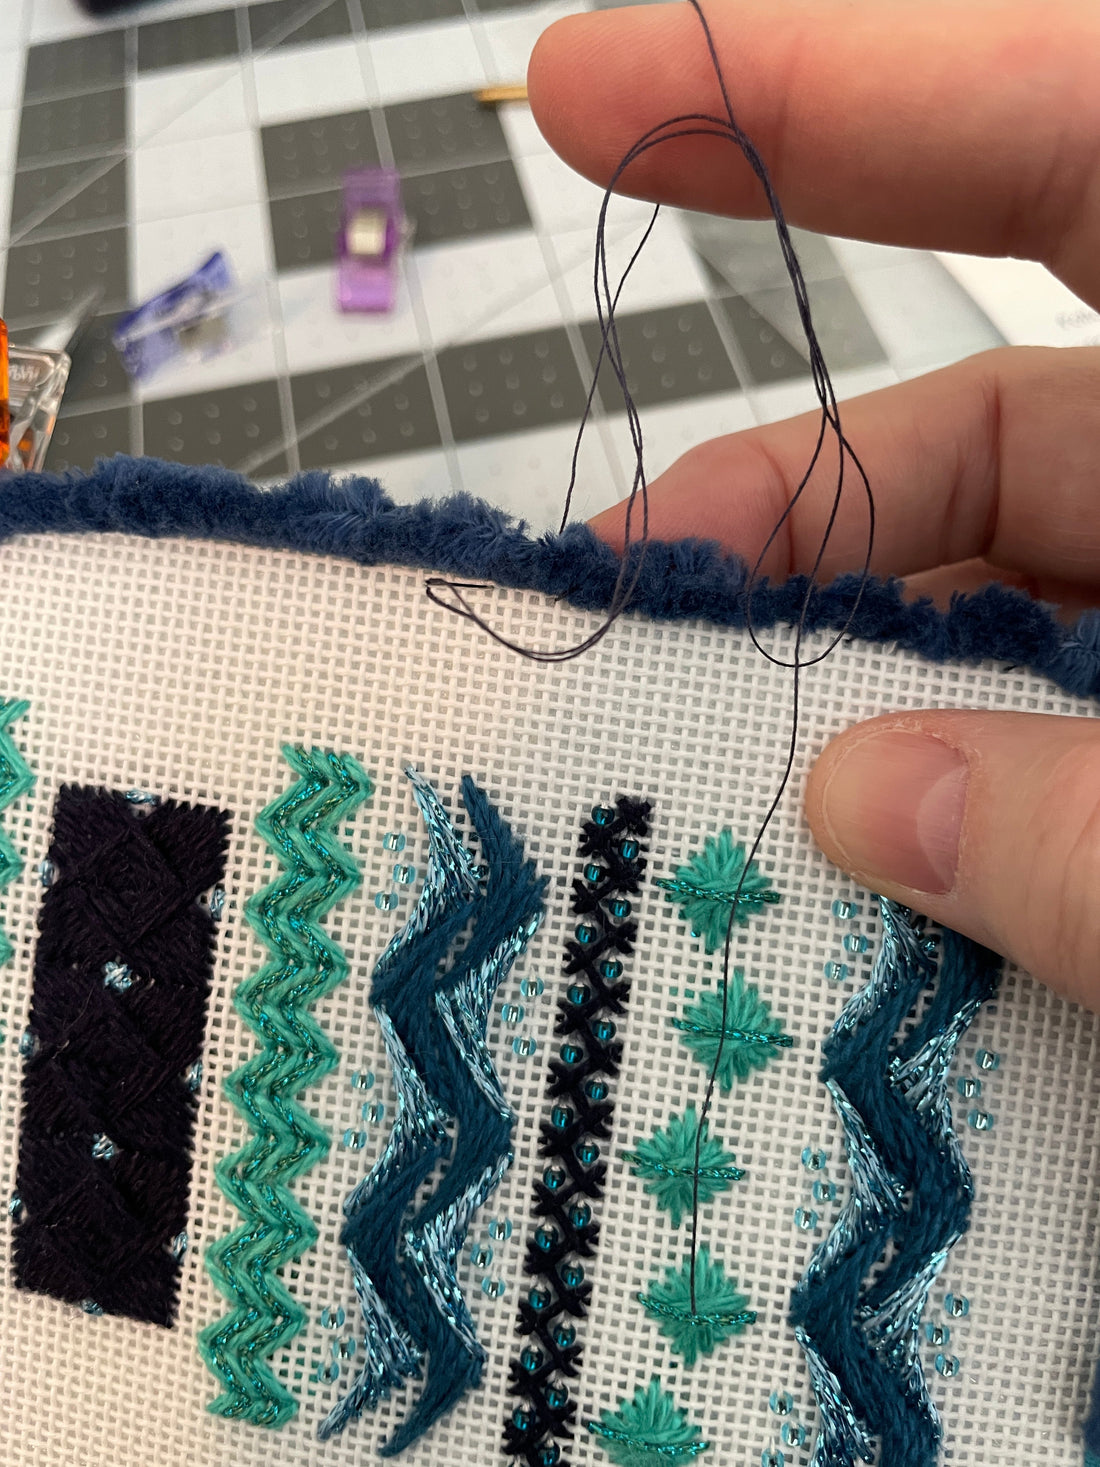
Lay and clip the chenille trim to the edge of the bell pull. Leave about an inch of trim excess on the starting edge. Using matching thread, attach the trim using a whip stitch.
Stay as close to the edge with your stitches as you can. As stitched, I pushed the trim forward as much as possible.
Tip: Don't pull the stitches too tight (you could pull the canvas). Just use tacking stitches.


I found that the raw edges of this bell pull were a little too thick for just one row of trim so I decided to add a second row behind the first. A bonus of adding a second row is that it hides the stitches from the first row of trim!
Again using whip stitch, tack the second row of trim by going through just the wool felt and the first row of trim. Once you get to the bottom edge, cut the chenille.


Step 6 - fluffing the trim
You may have noticed that, as you were sewing on the trim, the stitches caught and flattened the chenille. I've had this little turkey work comb for a while now - but you could use a small hair comb - it will do the same thing.
Gently brush the trim, pulling the fuzzy trim from beneath the tacking stitches.


Add the hardware and you are done! I've hung my little bell pull on my peg board by my desk!


